The Warehouse Slip module provides a structured way to document the movement of goods within the warehouse. It records key details such as the issuing party, the recipient, shipment information, and operational responsibilities, ensuring accuracy and consistency across all warehouse activities.
Below is an overview of the interface along with a complete explanation of all fields used within the module. This ensures that every document is created accurately and consistently across the system.
Interface
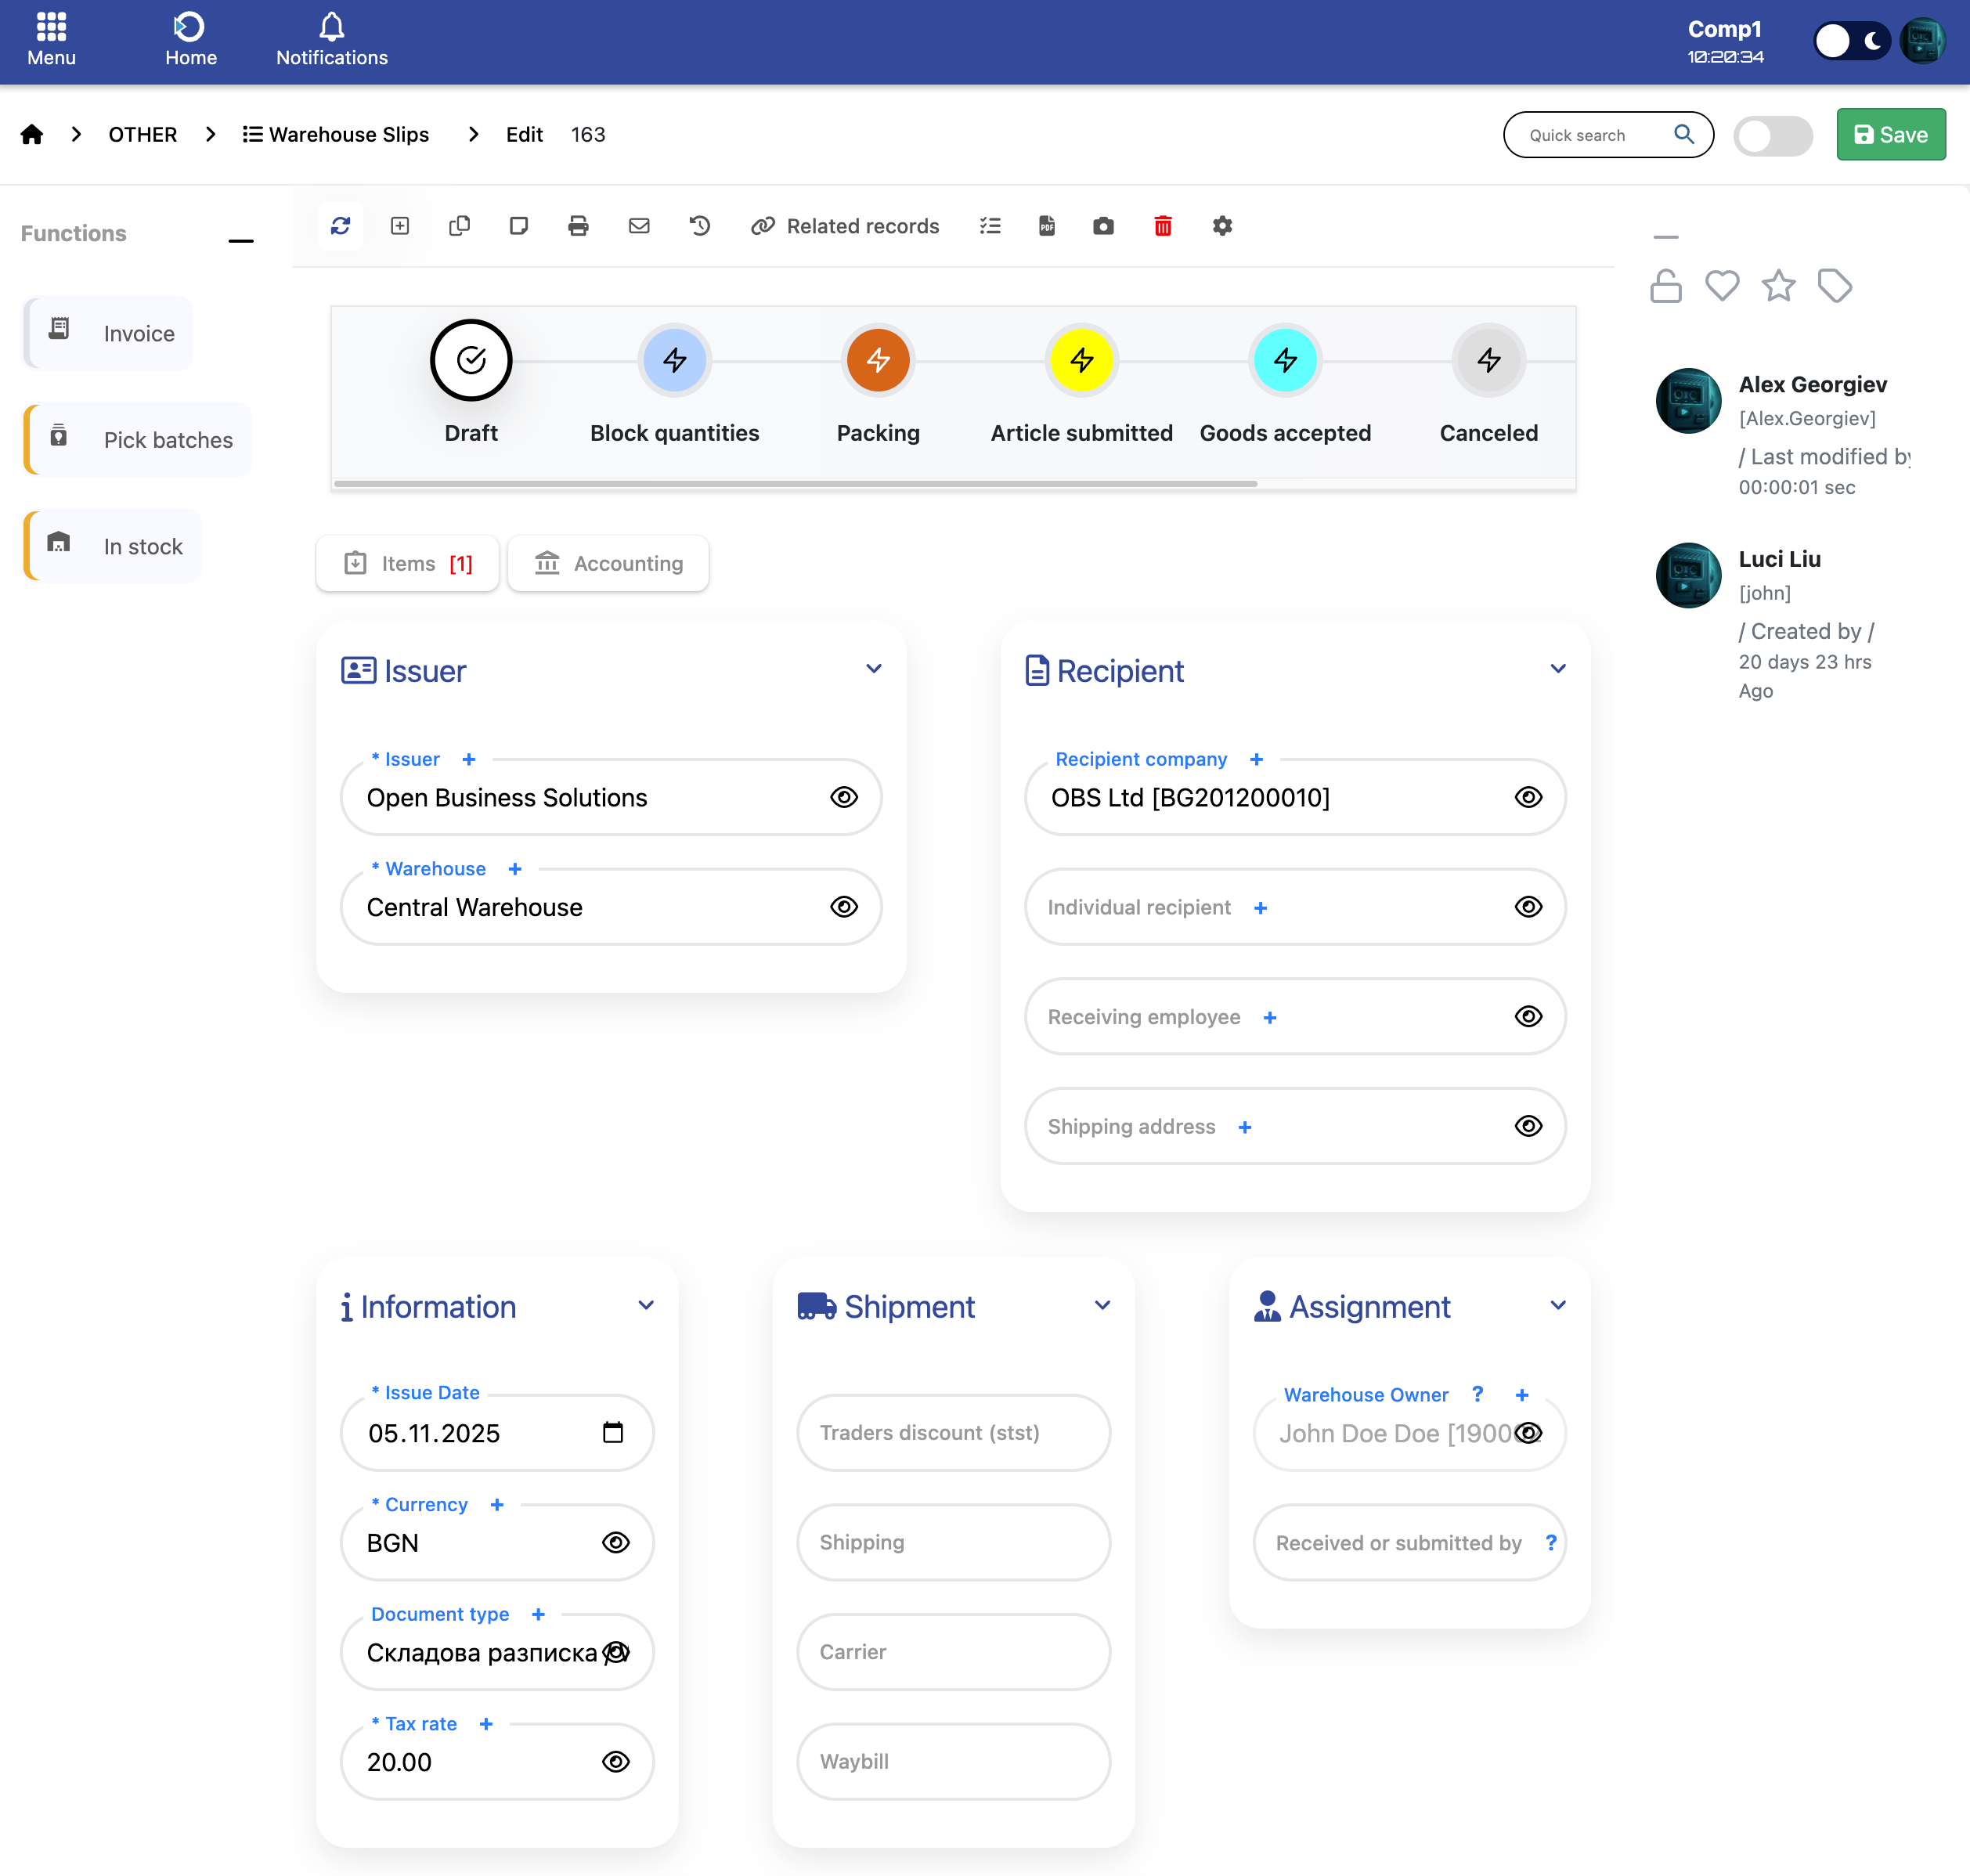
This section identifies the company issuing the document and the warehouse from which goods are released.
- Issuer – The company creating the Warehouse Slip.
- Warehouse – The warehouse responsible for issuing or preparing the goods.
Contains information about the receiving company or individual.
- Recipient company – The company receiving the goods.
- Individual recipient – The individual receiving the goods (optional).
- Receiving employee – Staff member responsible for receiving the goods.
- Shipping address – Delivery location for the goods.
General document information including date, currency, and tax settings.
- Issue Date – Date when the slip is created.
- Currency – Currency used for the document (e.g., BGN).
- Document type – Type of transaction (e.g., Warehouse Receipt).
- Tax rate – Applicable VAT percentage.
Shipment and logistics details related to the delivery of goods.
- Traders discount – Any discount applied to the shipment.
- Shipping – Shipping type or conditions.
- Carrier – Transport provider handling the shipment.
- Waybill – Document or tracking number for the shipment.
Defines responsibility and transfer of goods.
- Warehouse Owner – Person responsible for warehouse operations.
- Received or submitted by – Person who handed over or received the goods.
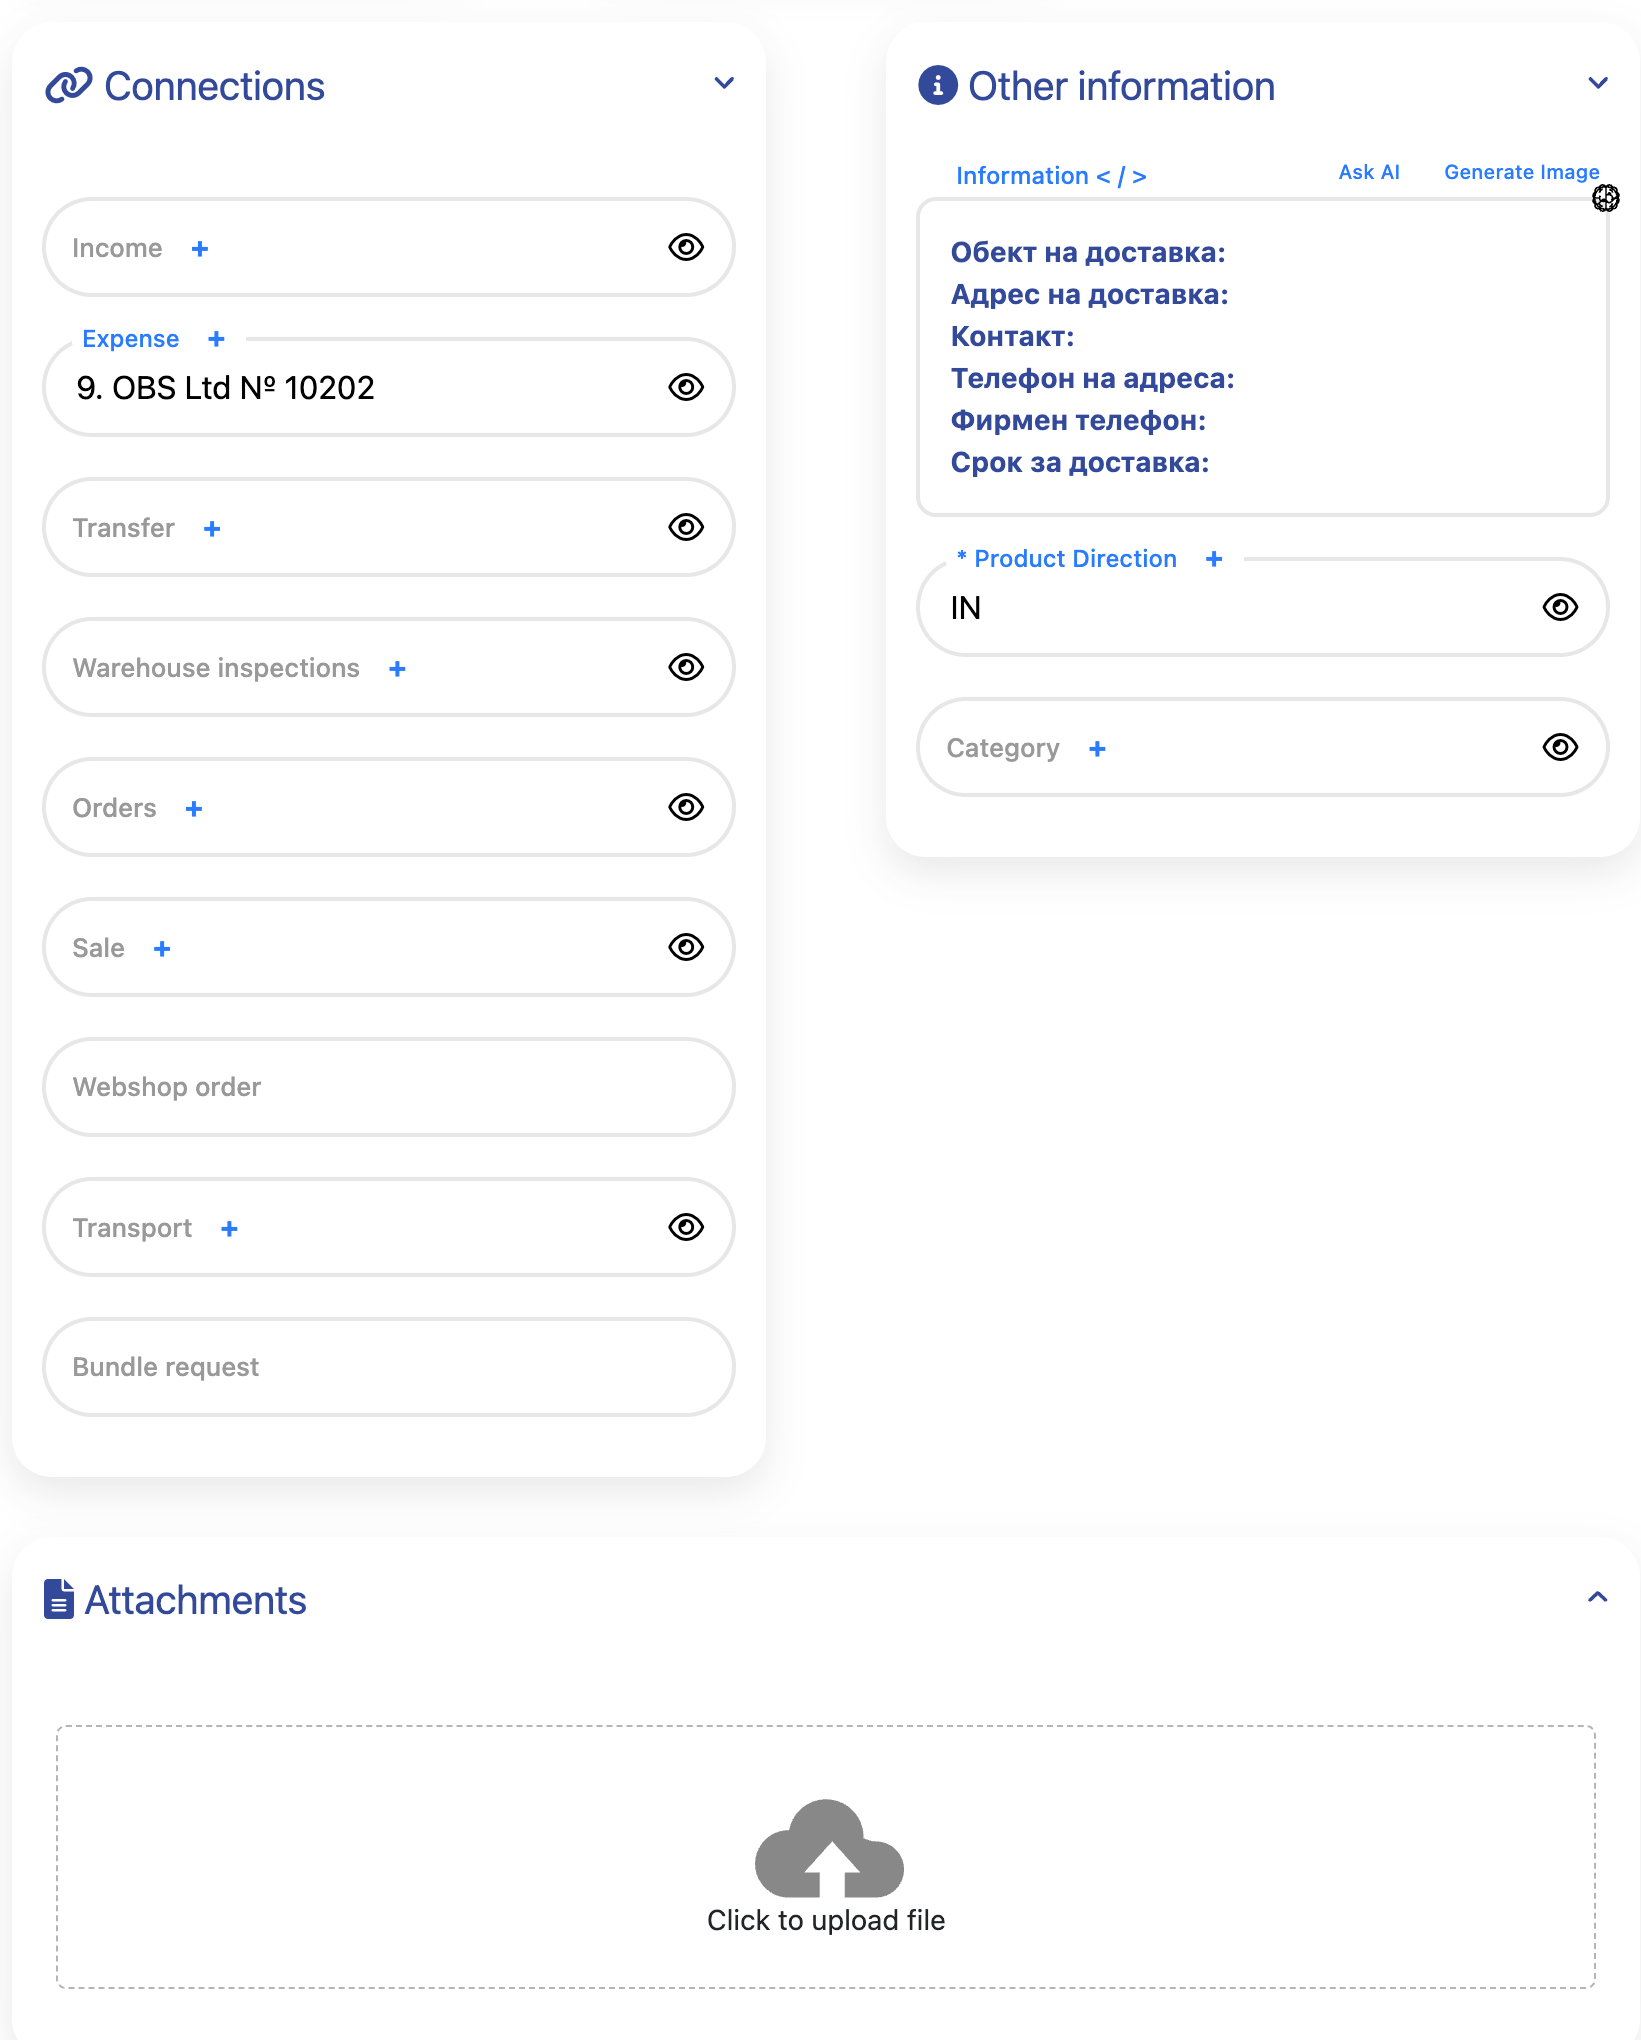
- Income – Links this Warehouse Slip to a related income document, if applicable.
- Expense – Connects the slip to an expense document (for example, for a specific customer or job).
- Transfer – References warehouse transfer documents associated with this slip.
- Warehouse inspections – Links inspection records related to the goods in the slip.
- Orders – Links to sales or purchase orders on which this warehouse operation is based.
- Sale – References sales documents (e.g. sales orders or invoices) created from the slip.
- Webshop order – Displays the related online shop order, when the slip originates from the webshop.
- Transport – Field used to connect transport-related records.
- Bundle request – Used when the slip is part of a bundled or grouped request.
- Information (text area) – Free-text field used for delivery details such as:
- Delivery site
- Delivery address
- Contact person
- Phone number
- Company phone
- Delivery deadline
- Product Direction – Defines the direction of the goods (e.g., IN).
- Category – Classification tag used to categorise the slip.
- Attachments – Upload area for documents, images or other files related to the slip.
To add products or materials to the Warehouse Slip, click the Items button highlighted in the screenshot below. This opens the items table where all goods related to this slip are added and managed.

When adding a new Item to the Warehouse Slip, the following fields must be completed. These fields define the product, its classification, quantity and pricing.
- Name – The name of the item being added.
- Description – Additional descriptive text.
- Category – The item category. Example: Goods.
- Product – Select a product from the catalog.
- Material – Select a material, if applicable.
- Quantity – The number of units added.
- Unit price – The price per unit.
- Discount – Optional item discount.
- Boxes count – Number of boxes included.
- Number in box – Units per box.
- Original EAN – The original barcode or EAN code.
Once all fields are filled in, click the Add button to insert the item into the Warehouse Slip.

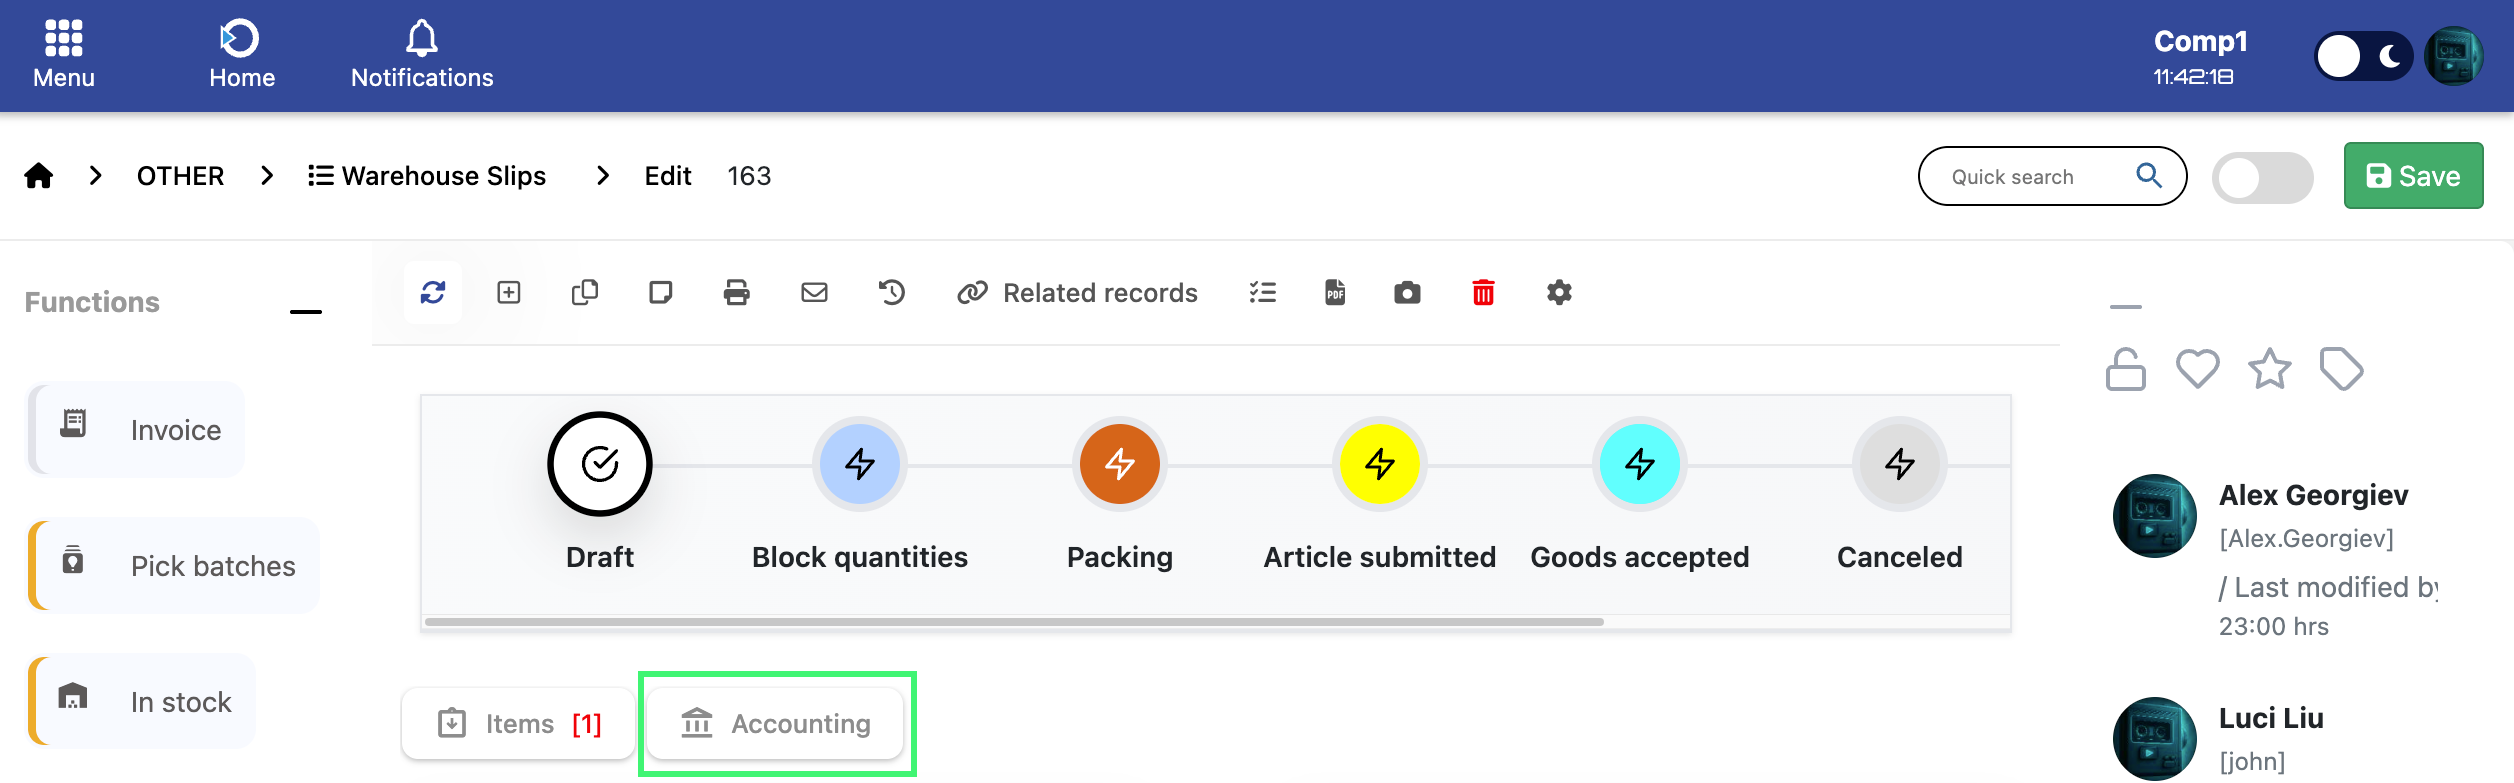
To view the financial details of the Warehouse Slip, click the Accounting button highlighted in the screenshot below.
- Accounting button – Opens all accounting-related information for the slip.
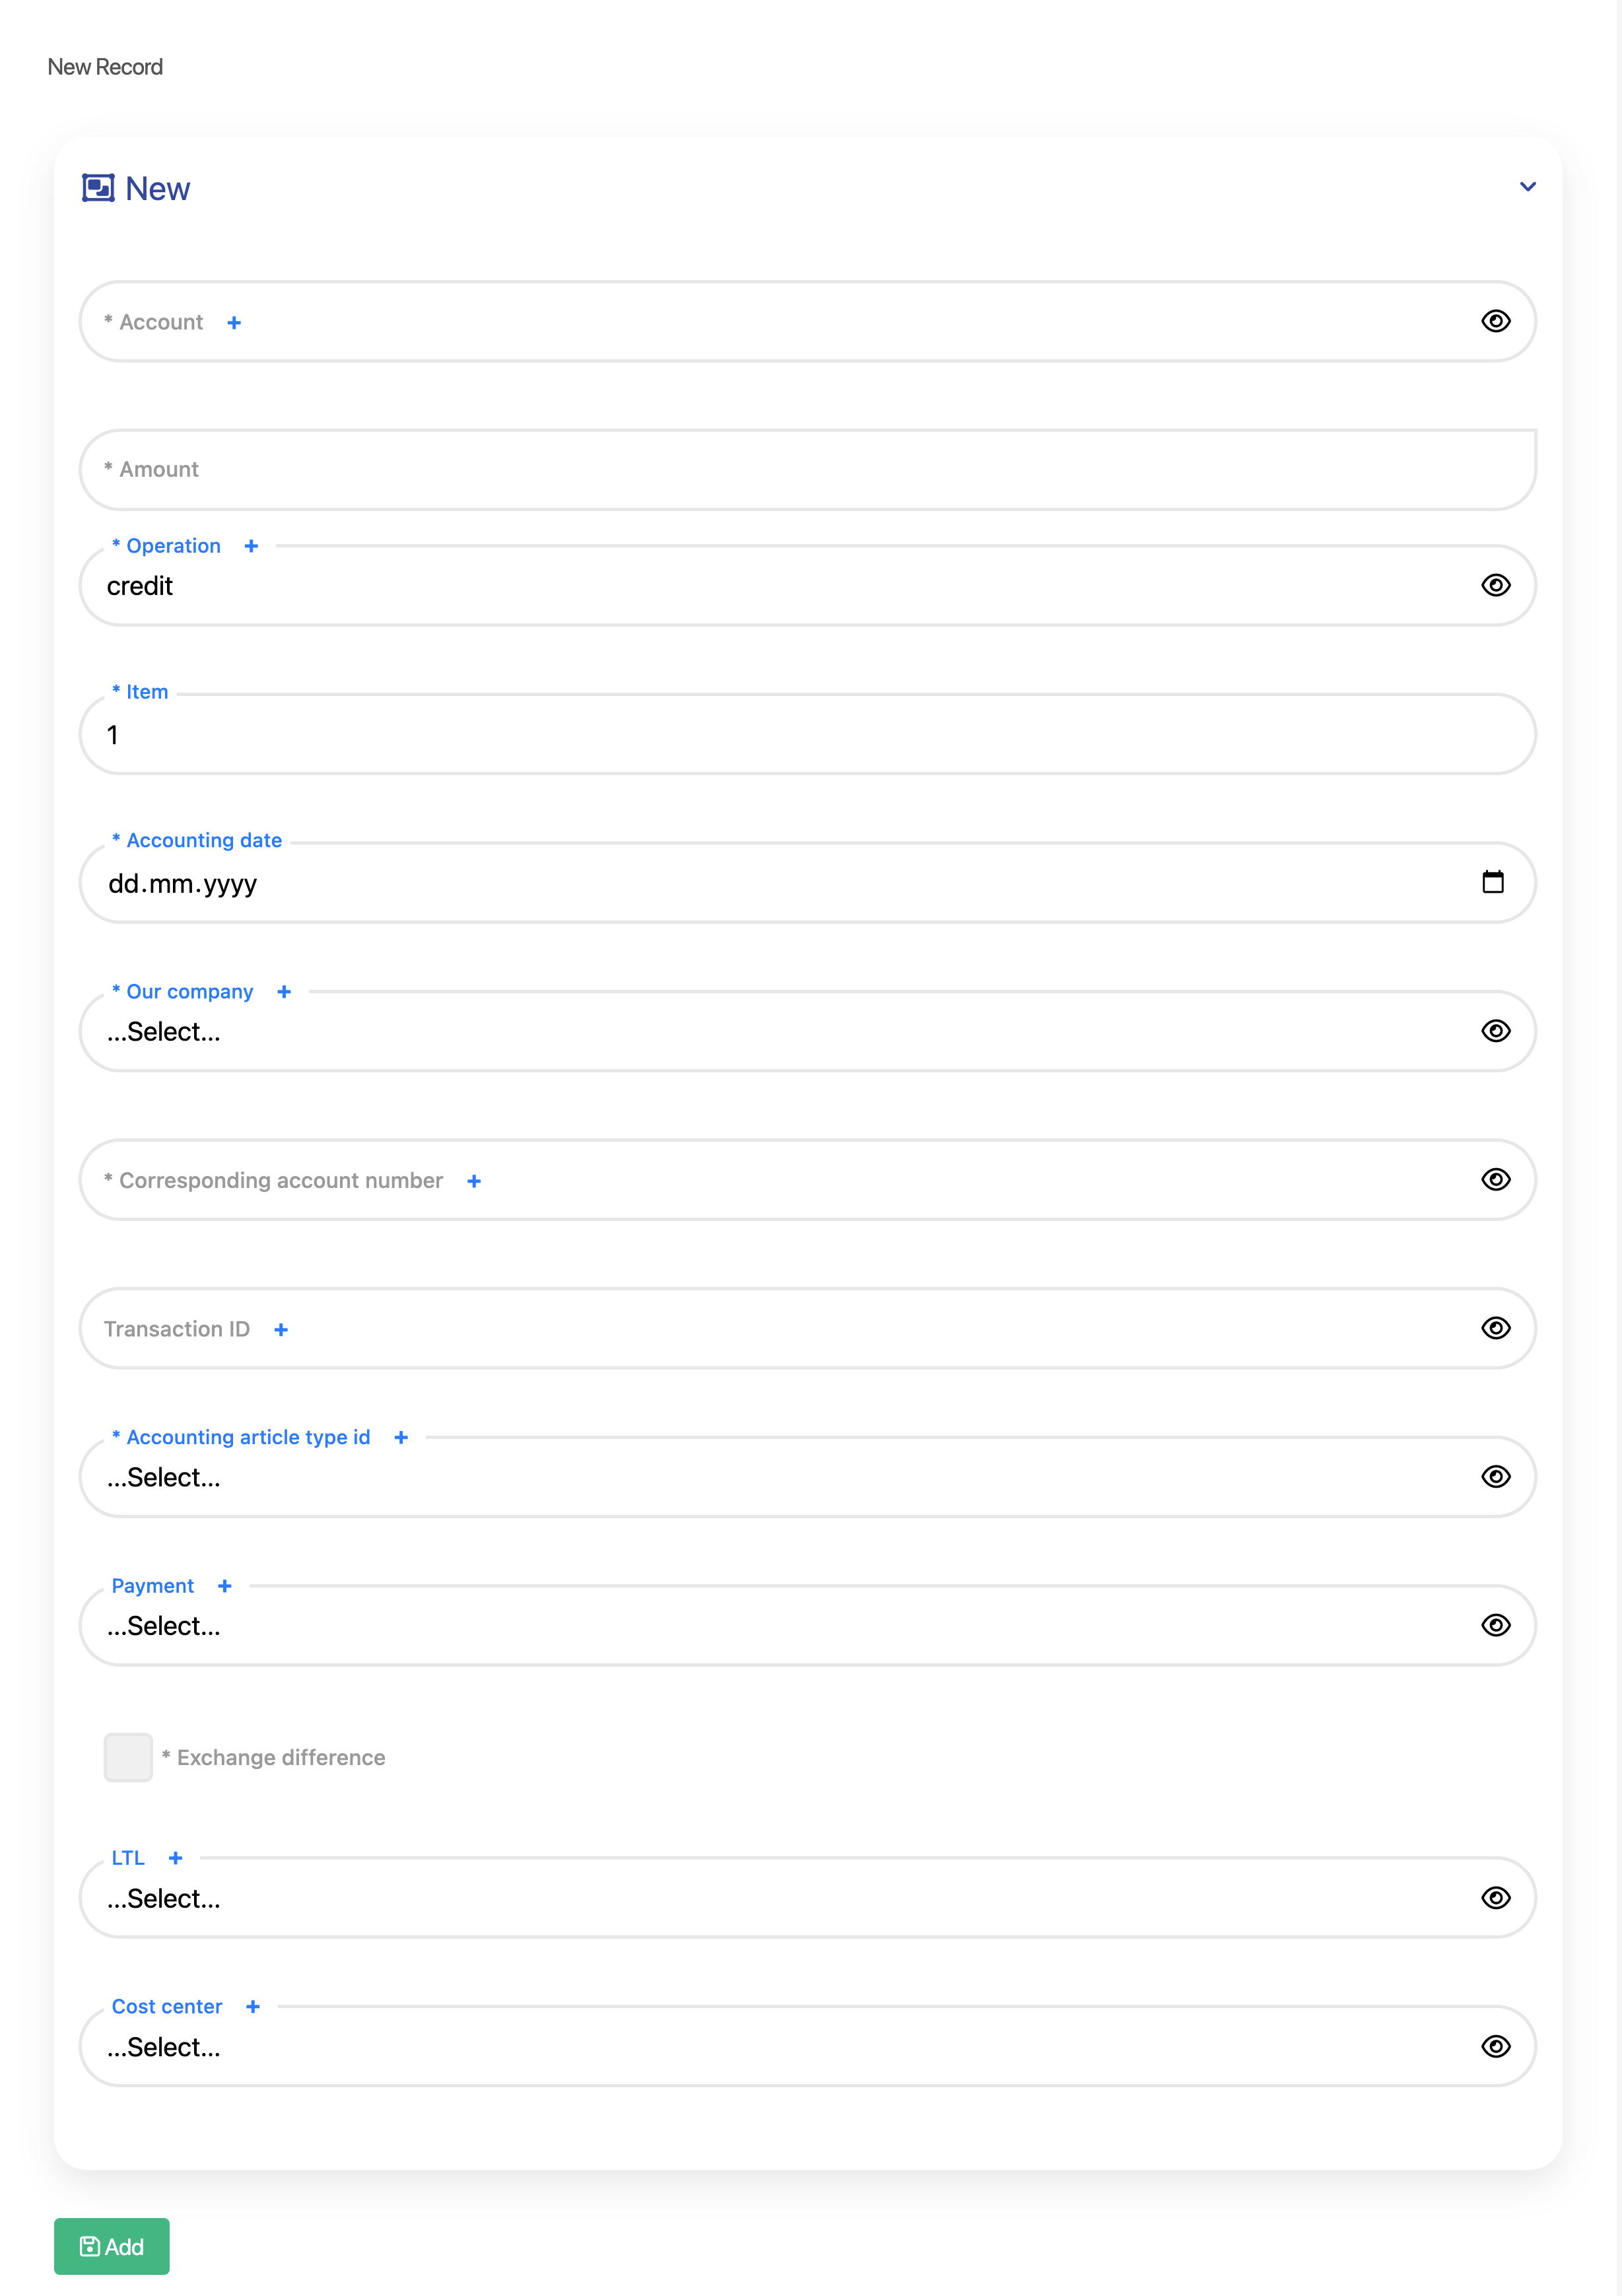
The Accounting form includes the following fields used to register financial entries related to the Warehouse Slip.
- Account – The main accounting account for this entry.
- Amount – The financial value of the transaction.
- Operation – Defines whether the entry is a debit or credit.
- Item – Links the accounting entry to a specific item in the slip.
- Accounting date – The date when the accounting entry is registered.
- Our company – The company involved in the transaction.
- Corresponding account number – The opposite (counter) account used in the transaction.
- Transaction ID – Identifier for tracking or linking accounting transactions.
- Accounting article type id – Classification of the accounting transaction type.
- Payment – Payment method or reference related to the transaction.
- Exchange difference – Checkbox used when exchange rate differences apply.
- LTL – Additional logistics or cost indicator (if applicable).
- Cost center – Department or cost center associated with the transaction.
After filling in the required fields, click Add to create the accounting record.
These quick actions allow you to perform essential operations directly from the Warehouse Slip.
- Invoice – Creates an invoice based on the warehouse slip.
- Pick batches – Opens batch selection for the items listed.
- In stock – Shows item availability in the warehouse.
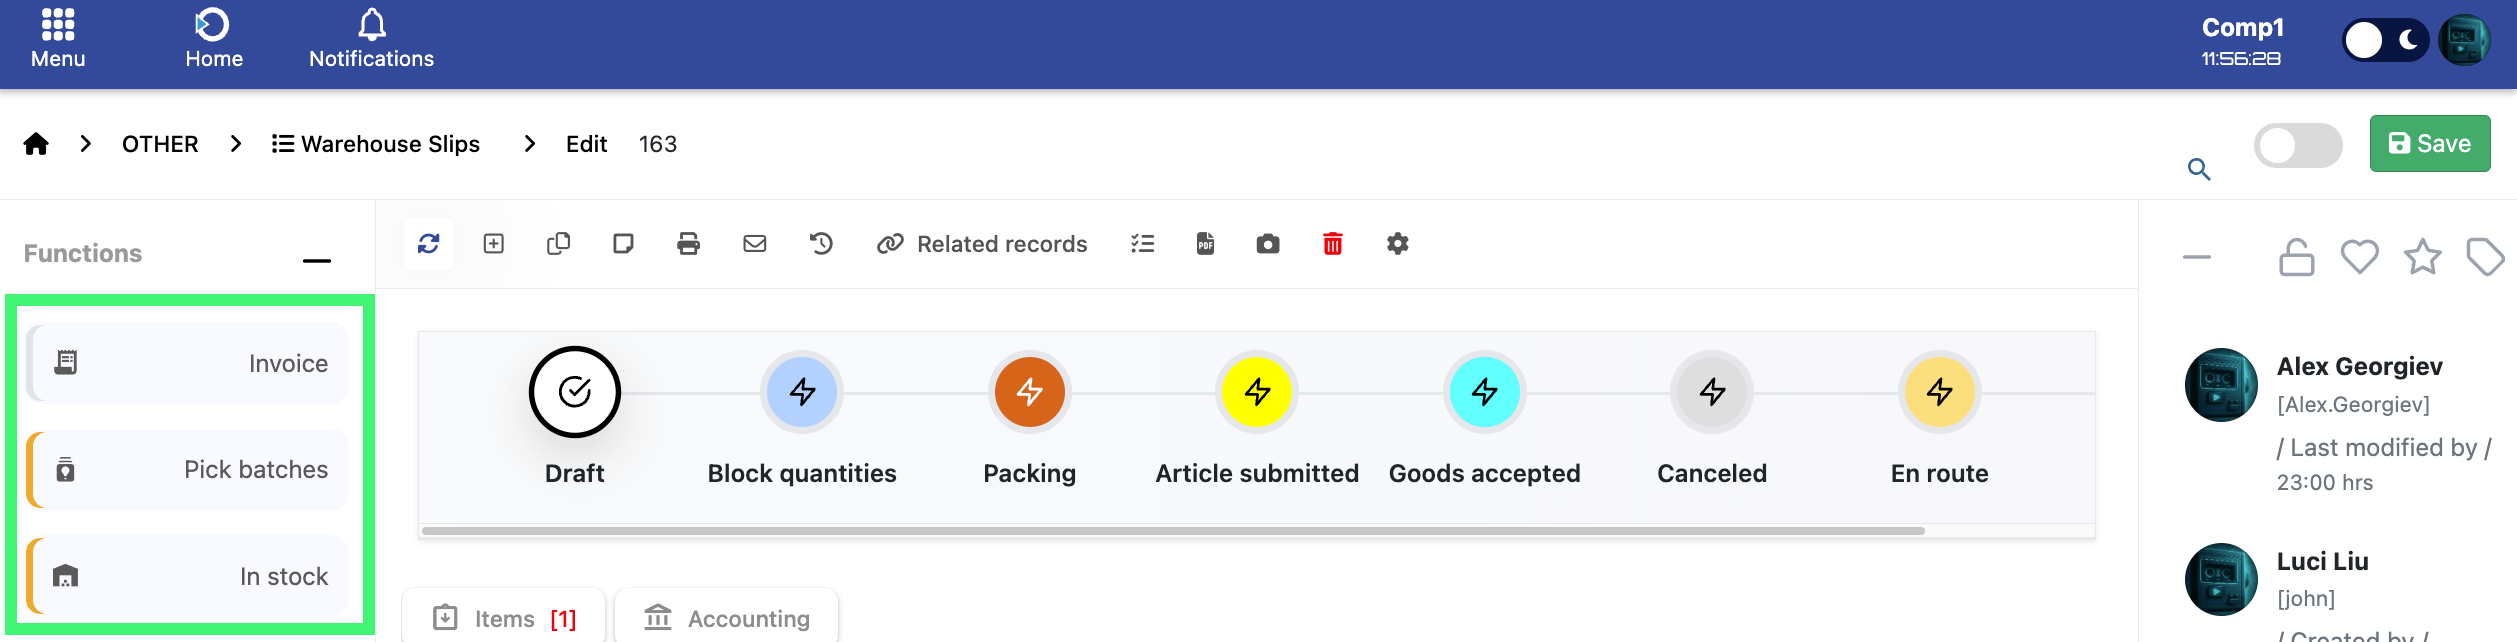
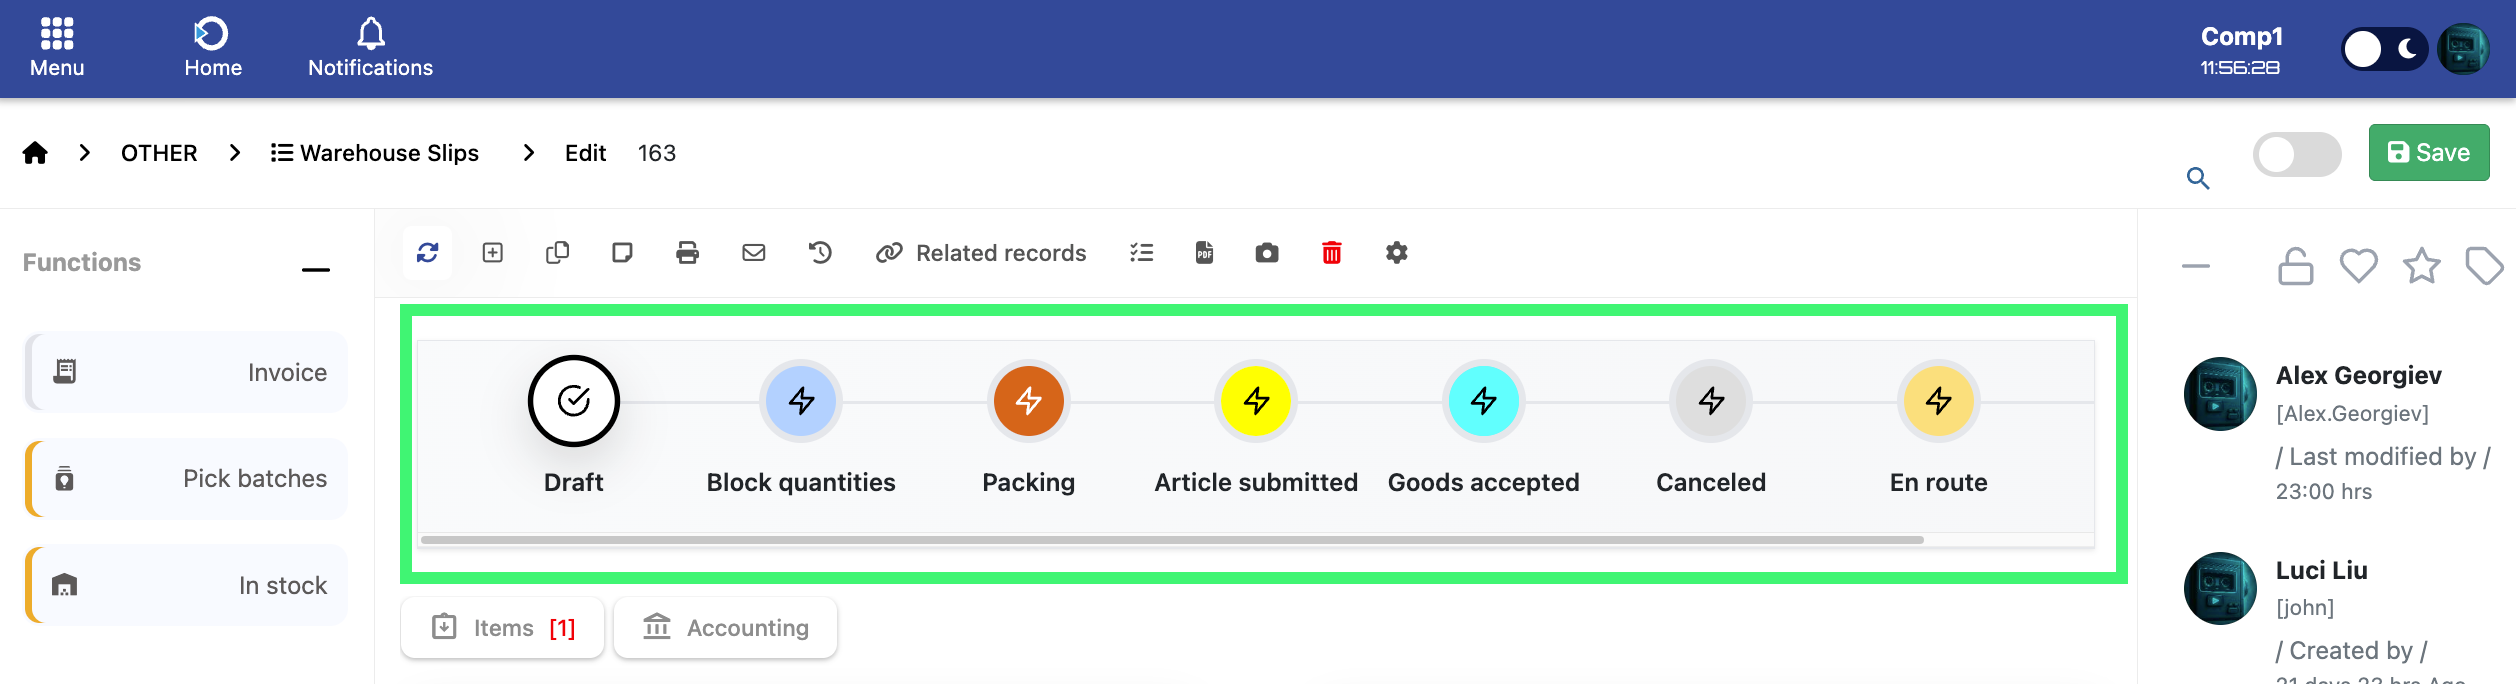
The Warehouse Slip follows a defined lifecycle. Each status represents a different processing stage of the document.
- Draft – Initial state where the document is created.
- Block quantities – Quantities are reserved for processing.
- Packing – Items are being packed.
- Article submitted – Items are submitted for delivery or processing.
- Goods accepted – Goods are received or accepted.
- Canceled – Document is marked as canceled.
- En route – Goods are in transit.
The lifecycle flow depends on whether the document is sent or received:
- If sending goods: Draft → Block quantities → Packing → Article submitted
- If receiving goods: Draft → Goods accepted